• home
    • Brittany & Xylon / Philadelphia PA
    • Nicole & Neil / Perkasie PA
    • Charissa & Joe / Middletown NY
    • Moet & Sheryl / Bethlehem PA
    • Gillian & Jon / Great Witley UK
    • Judy & Jack / Allentown PA
    • Kim & Geno / Orwigsburg PA
    • Nicole & Andy / Manheim PA
    • Hillary & Brian / Danielsville PA
    • Katie & Freddy / Sparta NJ
    • Samantha & Rob / Perkasie PA
    • Jill & William / Lambertville NJ
    • Amy & Ed / Bethlehem PA
    • Hollei & Josh / Kutztown PA
    • Lina & Andrew / Allentown PA
    • Rachael & John / New Tripoli PA
    • Danielle & Brad / Lancaster PA
    • Cleo & Dave / Bethlehem PA
    • Michelle & Eric / Orwigsburg PA
    • Emily & Zach / Emmaus PA
    • Becca & Chip / New Hope PA
    • Regina & Bobby / Bethlehem PA
    • Ariel & Ross / Philadelphia PA
    • Deborah & Jack / Bethlehem PA
    • Melissa & Ryan / Emmaus PA
    • Michelle & Dave / Fogelsville PA
    • Jackie & Jeff / Oley Valley PA
    • Lynn & Quin / Stroudsburg PA
    • Jessica & Ryan / Kutztown PA
    • Melissa & Dave / Kutztown PA
    • Maya & Tony / Allentown PA
    • Tina & Miquel / Orefield PA
    • Florals
  • blog
  • me
  • let's talk
  • press
Menu

Mark Kintzel Design

  • home
  • Events & Florals
    • Brittany & Xylon / Philadelphia PA
    • Nicole & Neil / Perkasie PA
    • Charissa & Joe / Middletown NY
    • Moet & Sheryl / Bethlehem PA
    • Gillian & Jon / Great Witley UK
    • Judy & Jack / Allentown PA
    • Kim & Geno / Orwigsburg PA
    • Nicole & Andy / Manheim PA
    • Hillary & Brian / Danielsville PA
    • Katie & Freddy / Sparta NJ
    • Samantha & Rob / Perkasie PA
    • Jill & William / Lambertville NJ
    • Amy & Ed / Bethlehem PA
    • Hollei & Josh / Kutztown PA
    • Lina & Andrew / Allentown PA
    • Rachael & John / New Tripoli PA
    • Danielle & Brad / Lancaster PA
    • Cleo & Dave / Bethlehem PA
    • Michelle & Eric / Orwigsburg PA
    • Emily & Zach / Emmaus PA
    • Becca & Chip / New Hope PA
    • Regina & Bobby / Bethlehem PA
    • Ariel & Ross / Philadelphia PA
    • Deborah & Jack / Bethlehem PA
    • Melissa & Ryan / Emmaus PA
    • Michelle & Dave / Fogelsville PA
    • Jackie & Jeff / Oley Valley PA
    • Lynn & Quin / Stroudsburg PA
    • Jessica & Ryan / Kutztown PA
    • Melissa & Dave / Kutztown PA
    • Maya & Tony / Allentown PA
    • Tina & Miquel / Orefield PA
    • Florals
  • blog
  • me
  • let's talk
  • press

latest and greatest:

blog
Succulent Wreath
Succulent Wreath
about 8 years ago
Autumn Craft:  Wild-Foraged Wreath
Autumn Craft: Wild-Foraged Wreath
about 8 years ago
Phone Book Pumpkins
Phone Book Pumpkins
about 9 years ago
Flannel Shirt Gift Tags
about 9 years ago
Rodale's Organic Life Cover
about 10 years ago

Fresh Tweets:

  • RT @robreiner: A President who is under investigation for possible money laundering, obstruction of justice & conspiring with an e… https://t.co/GnRQwYXiJb
    Jun 29, 2018, 8:07 PM
  • Flower Friday...is that a thing? #FlowerFriday #flowerpower #markkintzeldesign #pennsylvaniaflorist #weddingflowers… https://t.co/5ZBJYoczJh
    Jun 29, 2018, 7:48 PM

Phone Book Pumpkins

October 30, 2016 in Crafts

Every year I receive several phone books. Seriously, who uses those? They magically appear on my doorstep and ultimately wind up littered throughout the neighborhood. Despite my griping, I decided to hang on to a few for a special, inspired project.

To make these cuties, simply follow my easy DIY.

You'll need:

  • Phone books
  • Sharp scissors
  • Pencil
  • Piece of cardboard or heavy paper
  • Twigs
  • Glue - any craft glue will do

Here's how you do it:

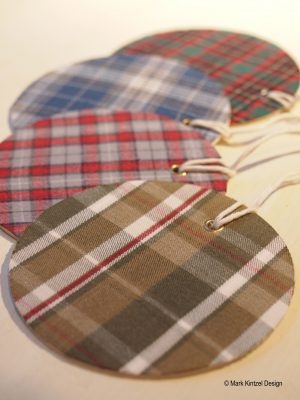
  1. Make a template of a pumpkin (see photo above) with cardboard or heavy paper. 
  2. Open the phone book to the center page.
  3. Lay the template over the book pages and towards the bottom of the book and trace an outline around the template. Keep the center of the template on the binding edge of the phone book.
  4. With a scissors cut a few pages at a time. I alternated cutting from pages on the left to the pages on the right of the book.
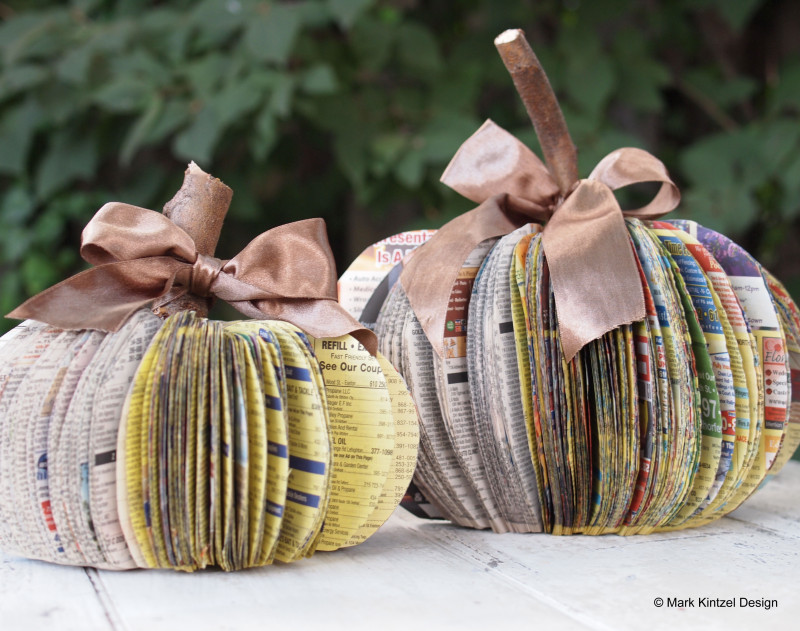
  5. Continue step #4 until you’re finished cutting all the pages then unfurl the pumpkin and glue the cover pages together.
  6. Glue a twig to the top center of the pumpkin and you’re done!

I think they turned out super cool and they were fun and easy to make. Thanks Yellow Pages!

Readers — you can opt out of receiving Yellow Pages Directories by visiting this site.

Happy crafting and happy Halloween!


Tags: DIY Holiday Crafts
Comment

Flannel Shirt Gift Tags

September 21, 2016 in Crafts, Christmas

If you're thinking about trashing those holey flannel shirts - think again. You can repurpose them into one of a kind holiday gift tags. I know, the holidays are a few months away but why not get a head start before the holiday rush.

With the exception of the flannel shirts, you can find all project ingredients at your local craft store. Here's what you'll need.

  • For the flannel shirts, you'll need to clean out your closet or visit a thrift store
  • Repositional spray adhesive
  • Card stock
  • Circle punch
  • Eyelet punch with 1/8" eyelets
  • Scissors
  • Ribbon or twine

Here's how ya do it:

  1. With the circle punch, cut circles out of card stock paper to create a gift tag.
  2. Cut a piece of flannel to cover the gift tag and set aside.
  3. Spray the gift tag on one side with spray adhesive.
  4. Place the flannel over the gift tag and press firmly and remove any wrinkles. You can reposition the fabric until you have the desired placement.
  5. With a scissors, cut away the excess fabric from the gift tag.
  6. With the eyelet punch, create the hole for the ribbon or twine. Note to crafters, if you don't want to use an eyelet punch, you can use a regular paper punch.
  7. Insert ribbon or twine in the hole.
  8. Your done!

Happy crafting!

Tags: flannel, repurposed flannel, DIY Gift Tags, Mark Kintzel Design, DIY Holiday Crafts
2 Comments
Newer / Older
Back to Top

email: mark@markkintzel.com
phone: (610) 554-7639